Password Update for HTCINC Domain Joined Laptops
This document details the below two scenarios for updating the login password in HTCINC domain joined laptops from outside the office network.
- Changing password before expiry
- Changing password after expiry
Please disconnect VPN as soon as you completed the password change
Prerequisite
Palo Alto Global Protect (GP) VPN Client should be installed in your workstation. Please get in touch with HTC IT Support, if the software is not installed in your LaptopStep 1: VPN Connectivity
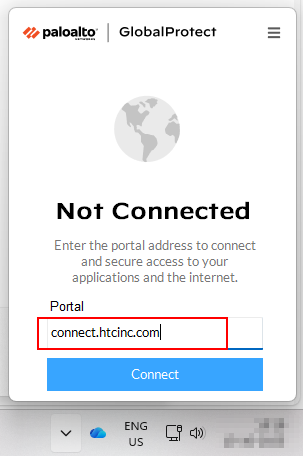
Search for the program “GlobalProtect” in start menu and click to Open
Type in “connect.htcinc.com” in the input text box and click on “Connect”

In the HTC IAM popup screen, enter the username and password

Enter the 6-digit OTP from the Google Authenticator Mobile App Note: If you are not having the OTP token, follow the instructions in Step-3 2FA Setup for intranet Apps to add the OTP token in your mobile.

VPN connection status can be verified either by clicking the system tray icon or by clicking the app from the windows search as done earlier.

Step 2: Change Password
Press “Ctrl”+”Alt”+”Delete” keys together and then select “Change a password”
Key in the old & new passwords and then press "Enter" to complete the password change

Step 3: Disconnect VPN
Click on GlobalProtect icon in system tray and Click on "Disconnect"Step 1: Set a new password
Login to Password Self-Service portal ( https://password.htcinc.com )
Select the “Forgot Password” tab and key in the username and Captcha text.

You will be presented with the Security questions that you had selected during the enrolment process. On successful validation, you will be able to set a new password.

Step 2: Connect VPN
Search for the program “GlobalProtect” in start menu and click to OpenType in “connect.htcinc.com” in the input text box and click on “Connect”
In the HTC IAM popup screen, enter the username and password
Enter the 6-digit OTP from the Google Authenticator Mobile App
VPN connection status can be verified either by clicking the system tray icon or by clicking the app from the windows search as done earlier.
Step 3: Update new password in Laptop
Once VPN is connected, lock the workstation by pressing "Win+L" keys together or from Start Menu as shown below
Now Login using the new password set via the Password Self-Service portal