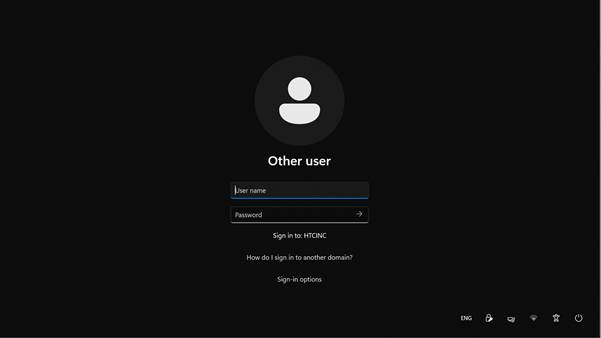
Using Global Protect (GP) VPN Before Logon on Windows
This how-to document lists the steps that needs to be
followed by an associate who has received an HTC laptop for official use. By
following the below procedure, the associate will be able to setup his / her
user profile in the laptop by first connecting to the VPN.
This procedure is required only during the initial setup.
1. Power on the Laptop. Once the computer is booted, click on the network icon in the lower right corner to connect the laptop to your home WiFi Windows 10
 Windows 11
 Clicking on this network icon should bring up a list of
available WiFi networks. Choose your home network and connect as you would
normally on any device
2. Now we can connect to the VPN by clicking on the Network
Sign-in icon (as shown below).
Windows 10
Clicking on this network icon should bring up a list of
available WiFi networks. Choose your home network and connect as you would
normally on any device
2. Now we can connect to the VPN by clicking on the Network
Sign-in icon (as shown below).
Windows 10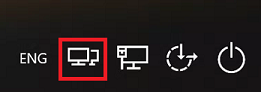 Windows 11
 3. This should start the VPN connection; you'll first see a
connecting screen.
3. This should start the VPN connection; you'll first see a
connecting screen.
 4. Next it should prompt you to connect to the "Global
Protect VPN Client". Enter the GlobalProtect Portal address "connect.htcinc.com”
and enter to connect.
4. Next it should prompt you to connect to the "Global
Protect VPN Client". Enter the GlobalProtect Portal address "connect.htcinc.com”
and enter to connect.
 5. Next it will redirect to our IAM page, enter your HTCINC
AD Username and Password and click Sign in.
5. Next it will redirect to our IAM page, enter your HTCINC
AD Username and Password and click Sign in.
 6. Next enter the 6 digits OTP". Click on "Submit"
to connect.
6. Next enter the 6 digits OTP". Click on "Submit"
to connect.Note: If you are not having the OTP token, follow the instructions in Step-3 2FA Setup for intranet Apps to add the OTP token in your mobile.

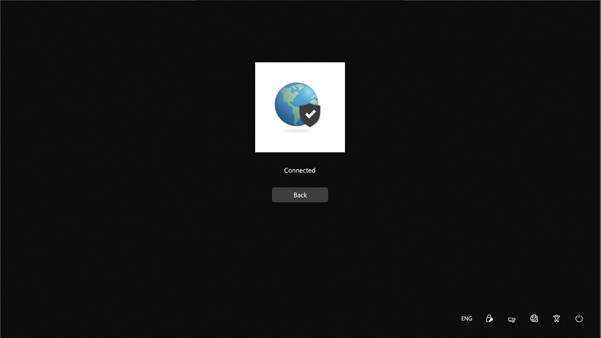
7. Once entered the OTP you will see the below screen that your GP is connected.
 8. After connected, you will see an additional
"Disconnect" Icon in the lower right corner
8. After connected, you will see an additional
"Disconnect" Icon in the lower right corner
This confirms you are connected to HTC network. Now you can login to the laptop with your HTCINC AD credentials